The latest release of Blender, version 3.2, now includes the ability to directly paint vertex in sculpt mode, among other features. In this tutorial, we will guide you through using these new painting tools, configuring EEVEE and Cycles to display the results, and ultimately rendering vertex paint to texture for export to other tools or game engines. Let’s begin. For a more detailed, step-by-step video tutorial, please refer to the link provided.
Sculpting Vertex Paint in Blender 3.2
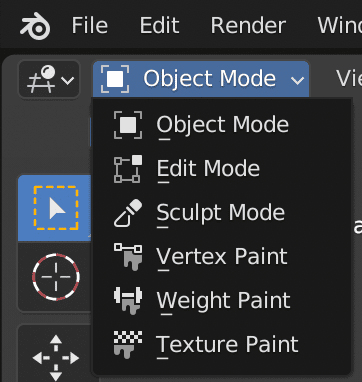
To start vertex painting in Blender, you will need an object with enough vertices to paint on. Keep in mind that fewer vertices will result in less detail. Once you have selected the object you wish to paint, switch to Sculpt Mode:
The toolbar in Sculpt mode houses the recently added paint tools:
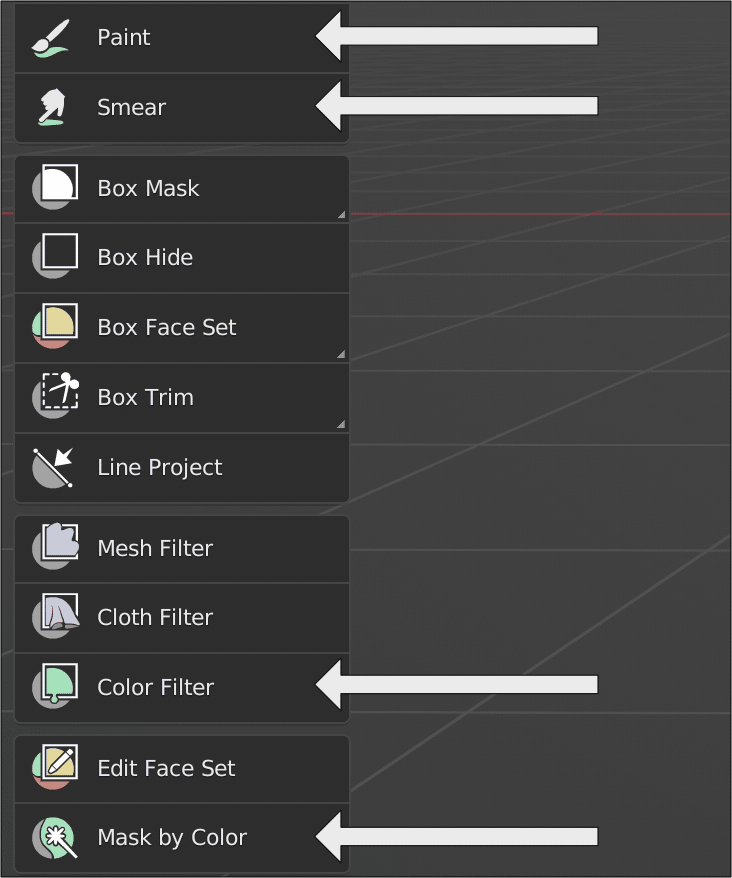
After choosing the Paint option, you can find an assortment of paint settings in the Tools menu (accessible with the N hotkey), including the recently added controls for Wetness and Brush tip:
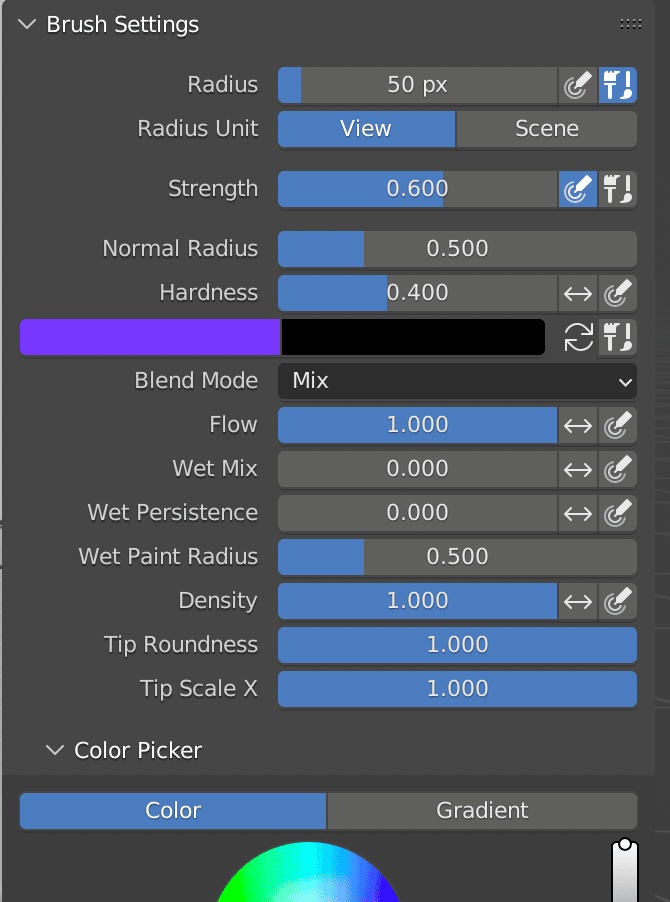
Setting the brush settings and selecting a color is all that’s left to do before painting on your object. It’s a straightforward process.
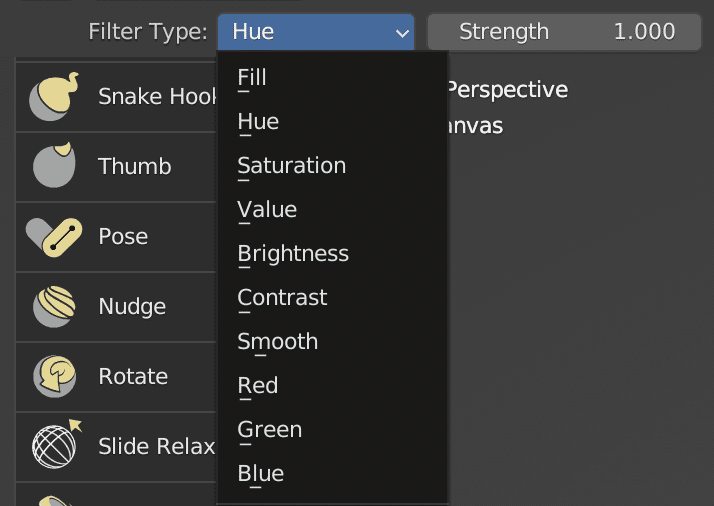
By using the Color Filter tool, you can make adjustments to the entire image, except for the part that’s currently masked out. Simply choose Color Filter and then pick options like Hue or Brightness. Adjust by moving the mouse left or right to increase or decrease.
How to display Vertex Color in Cycles/EEVEE.
After completing your art piece, you may realize that it disappears when you switch to textured or rendered mode. However, there’s no need to worry as it can be easily resolved.
Simply select your object and apply a material to it.
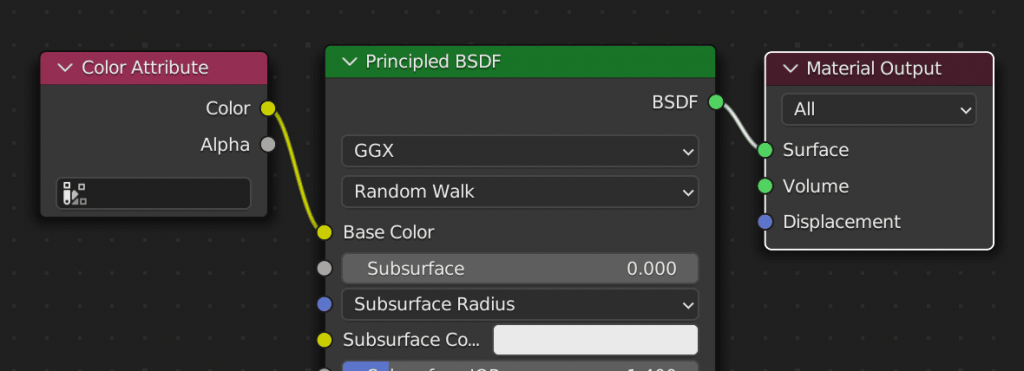
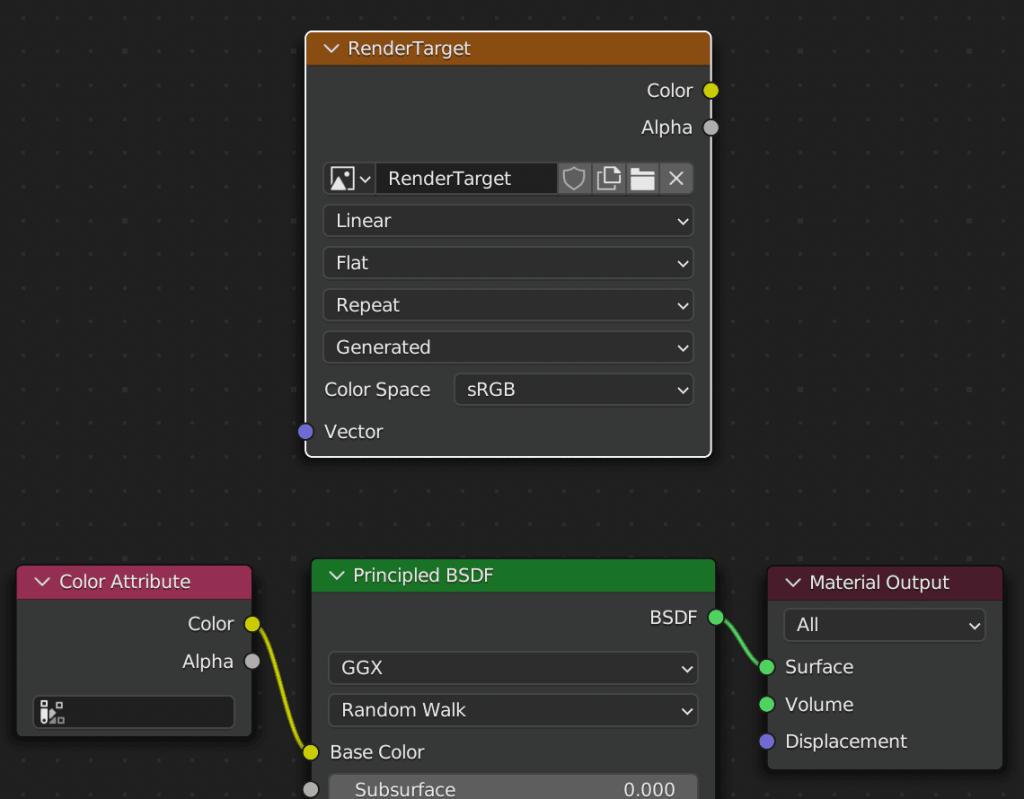
Next, launch the Shader Editor and adjust your material to meet your needs:

You can find the Color Attribute under the Inputs category. After connecting it, your outcomes will become visible in both textured and rendered modes.
Converting Vertex Color to Texture
Although this step is not mandatory, it may be necessary if you are using a game engine or a different DCC tool that doesn’t support vertex color information. In such cases, you can consider rendering to texture.
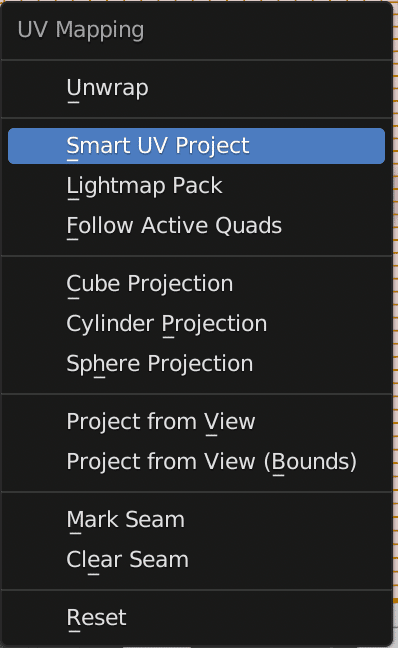
To begin, you must apply a UVMap to your object. First, select your painted object, switch to edit mode, and select all vertices (press A key twice). Next, press the U key and choose Smart UV Project. The detail options can be left as they are.
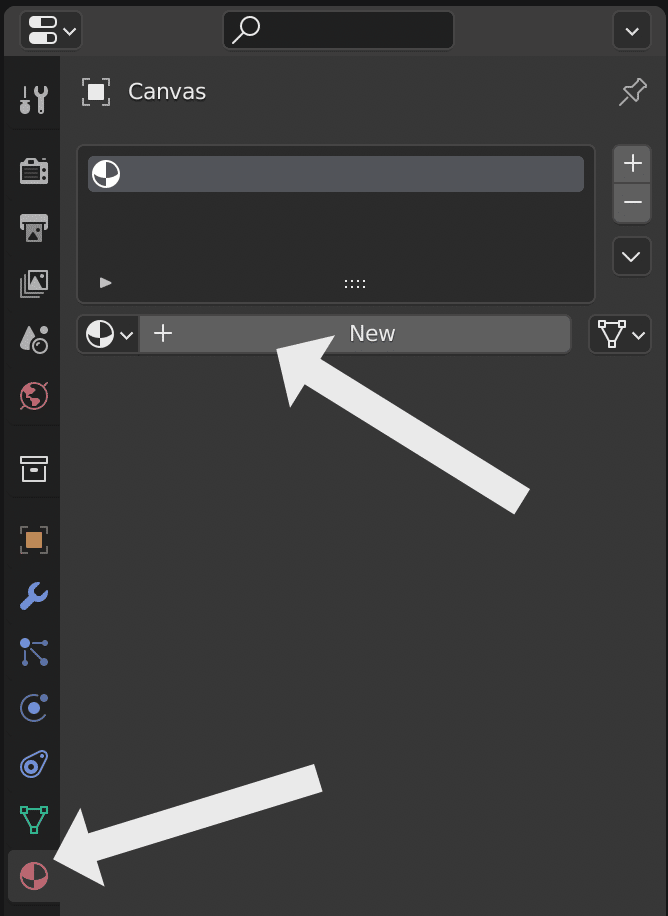
To proceed, we require a texture target for rendering. Launch the Image Editor, generate a fresh Image, select a resolution, and give it a name:

Our objective is to navigate to the Shader Editor and incorporate an image into our shader network while having our object chosen. It is unnecessary to establish any connections with the image; we simply have to insert a Texture node and select the Image Texture option. Afterwards, we should set the target to our freshly produced image.
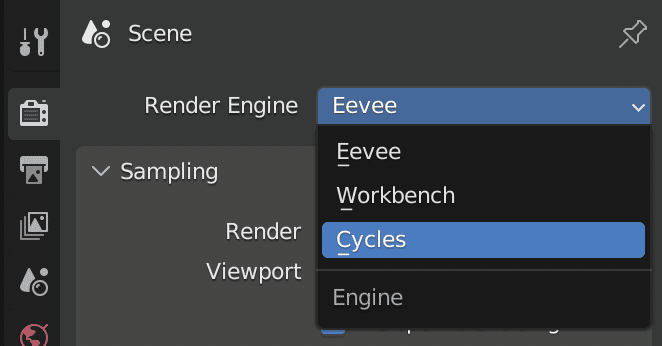
It is now time to render the vertex data onto the texture. Navigate to the render tab and switch to the Cycles mode.
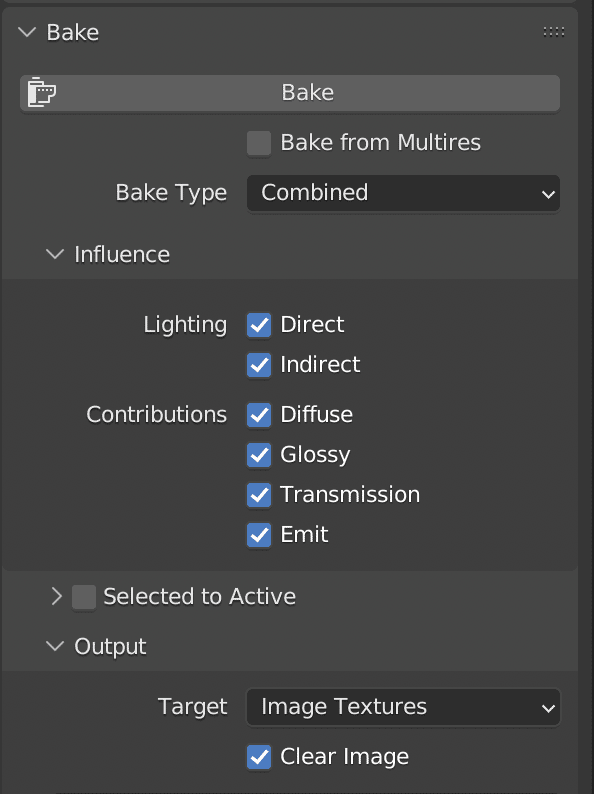
Scroll down to find the Bake section. Ensure that Image Texture is targeted, choose the desired items to be baked, and finally, hit the Bake button.
As the rendering process takes place, a progress bar will be displayed. After it finishes, you can switch to the Image Editor and view the freshly rendered texture. Remember to save the texture you created to an image file on your system.

And there you have it! Your task is complete!
In the video below, you can witness the complete procedure of Blender 3.2 Sculpting painting to vertex, adjusting the EEVEE and Cycles renderer to display your paint, and ultimately, generating the outcomes to texture in a step-by-step manner.